Alternate Receiver
The feature Alternative Receiver has integrated in the contracts of the xDai bridge as part of an upgrade. With this feature it becomes possible to transfer tokens through the bridge to any account by very simple actions. It means that Alice can send Dai to Bob’s account on Gnosis chain in one transaction, and Bob can send xDai to Clare’s account on the Ethereum Mainnet in one transaction too.
Due to different nature of tokens on two sides of the xDai bridge the operations to transfer assets to an alternative receiver from one chain to another differ as well.
The xDai Bridge Alternative Receiver functionality. The transfer requires 2 transactions, one to unlock the contract and a second to process the transaction. Manual methods are described below this section.
Dai to xDai
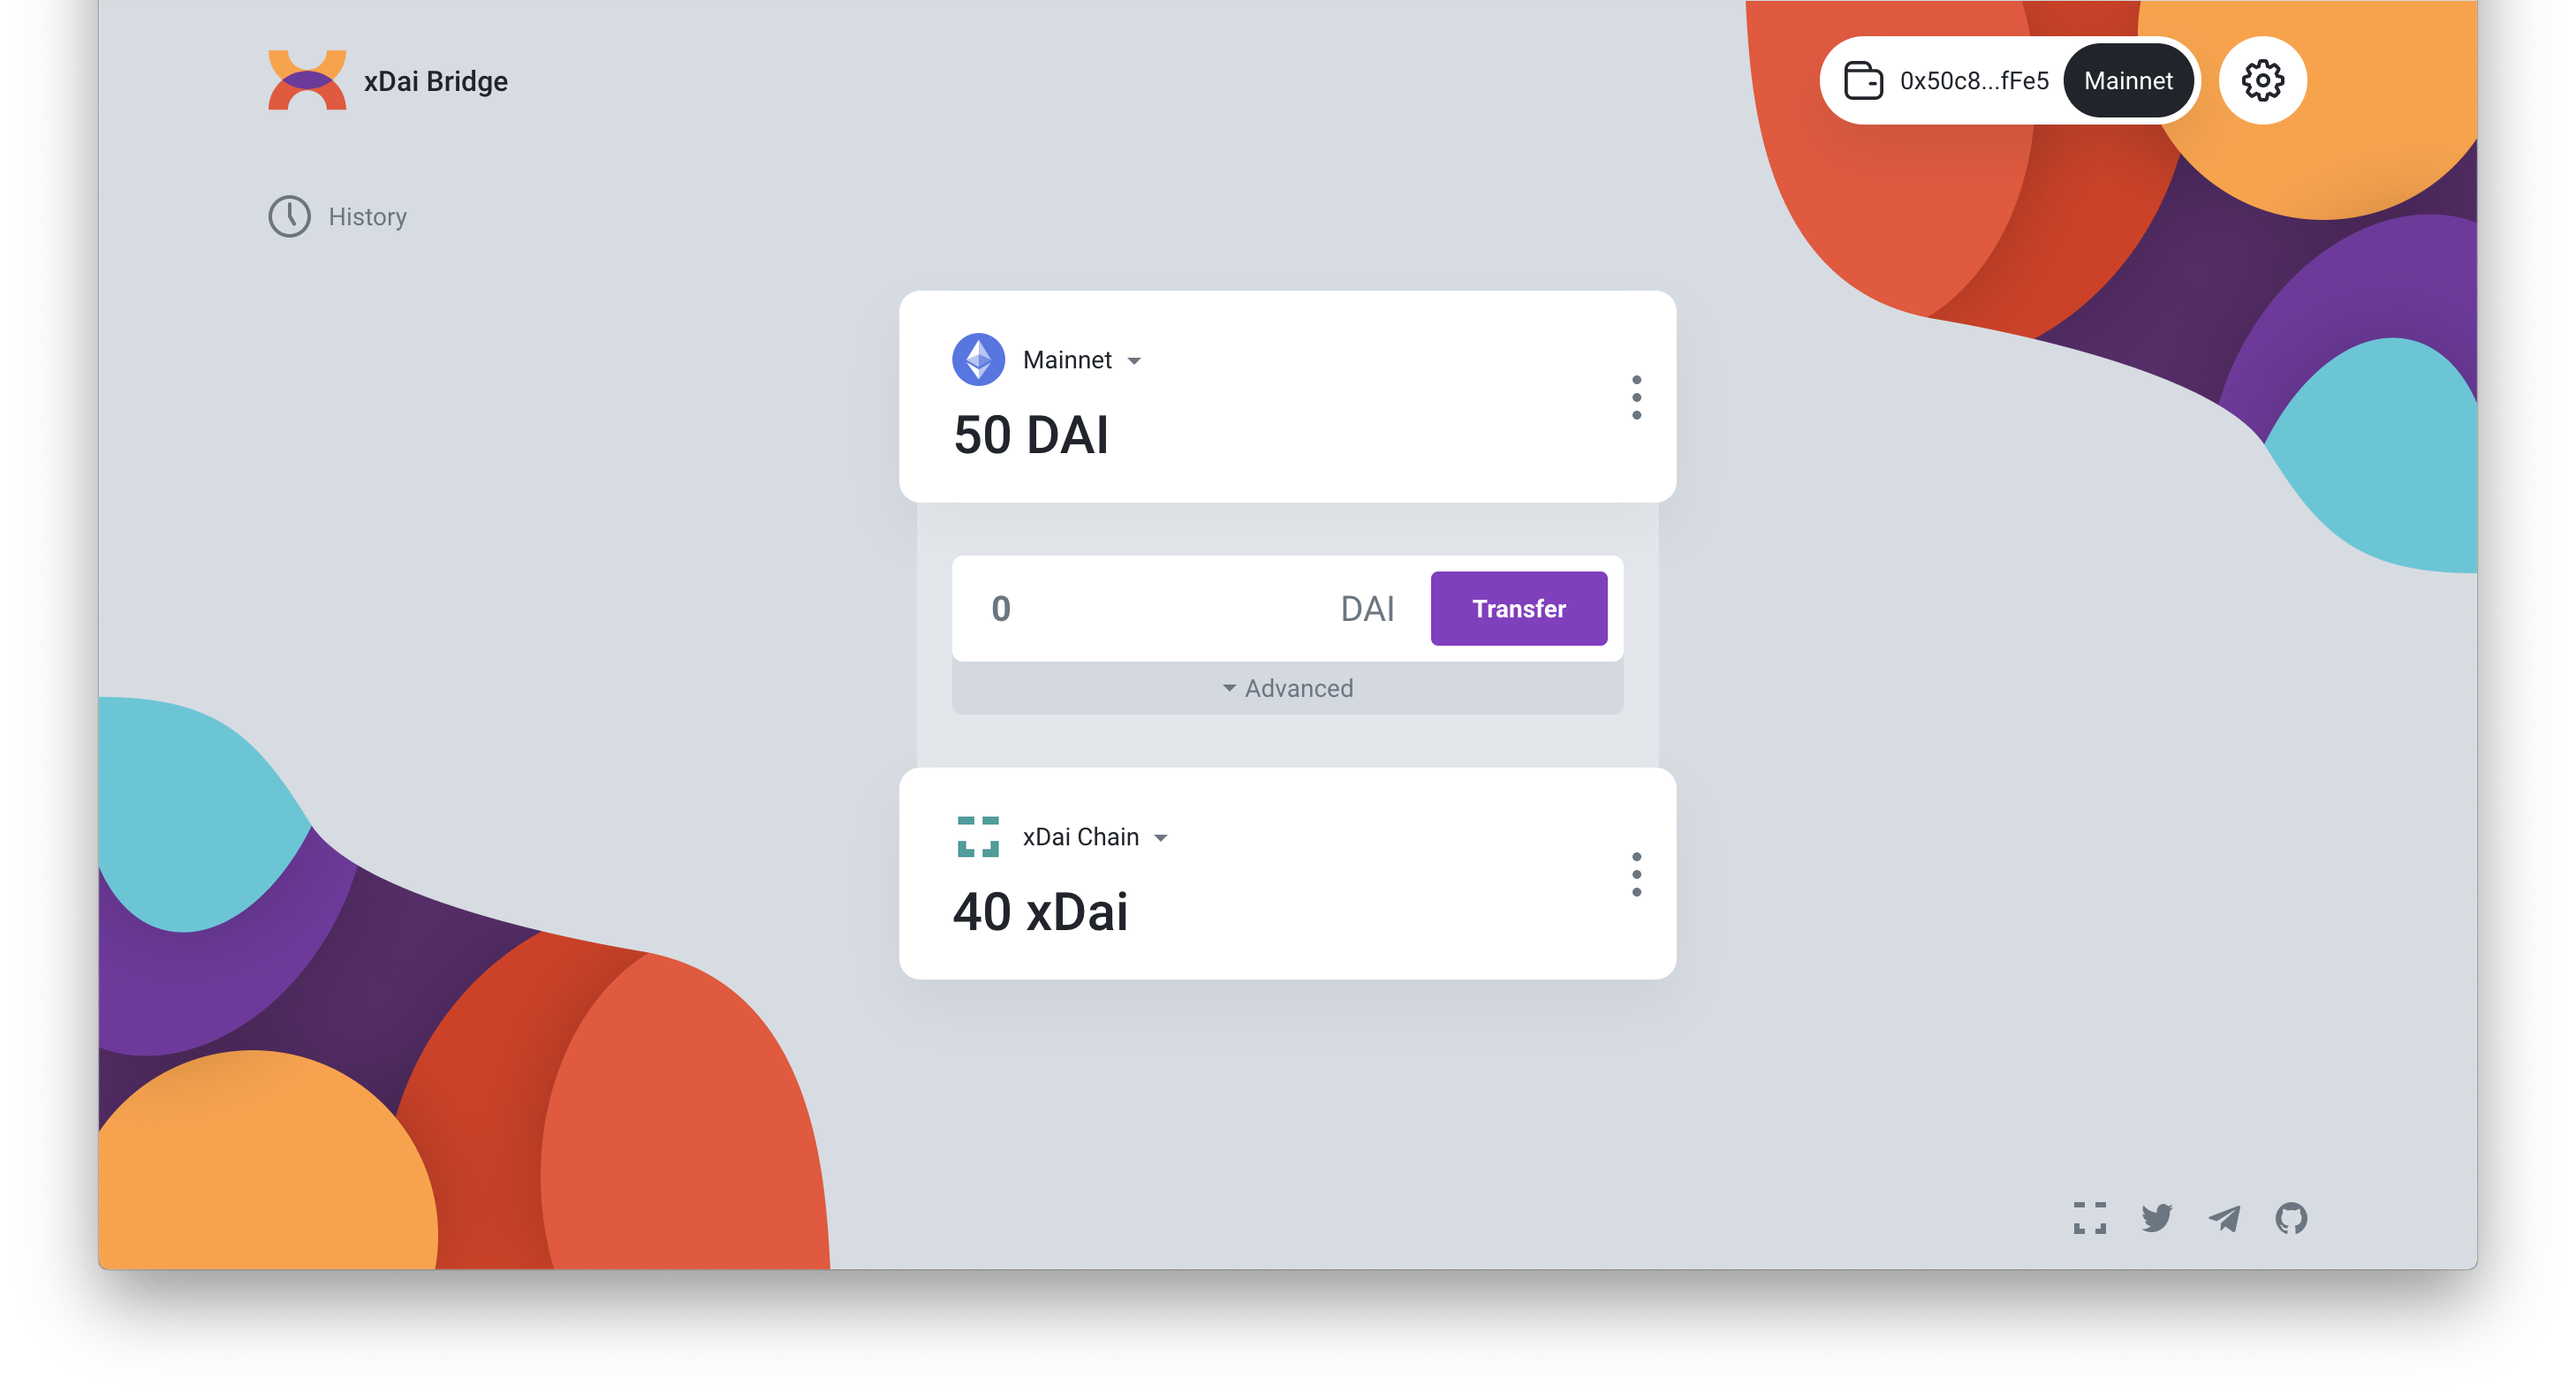
- Go to the bridge UI and connect your MetaMask Wallet.
-
Determine Single Tx Unlock or Infinite Tx Unlock. You may want to approve the transfer for a single transaction, or approve the contract to make unlimited transfers from this address to many other addresses. For a Single TX Unlock, proceed directly to step 3 below. For infinite TX unlock, complete the following.
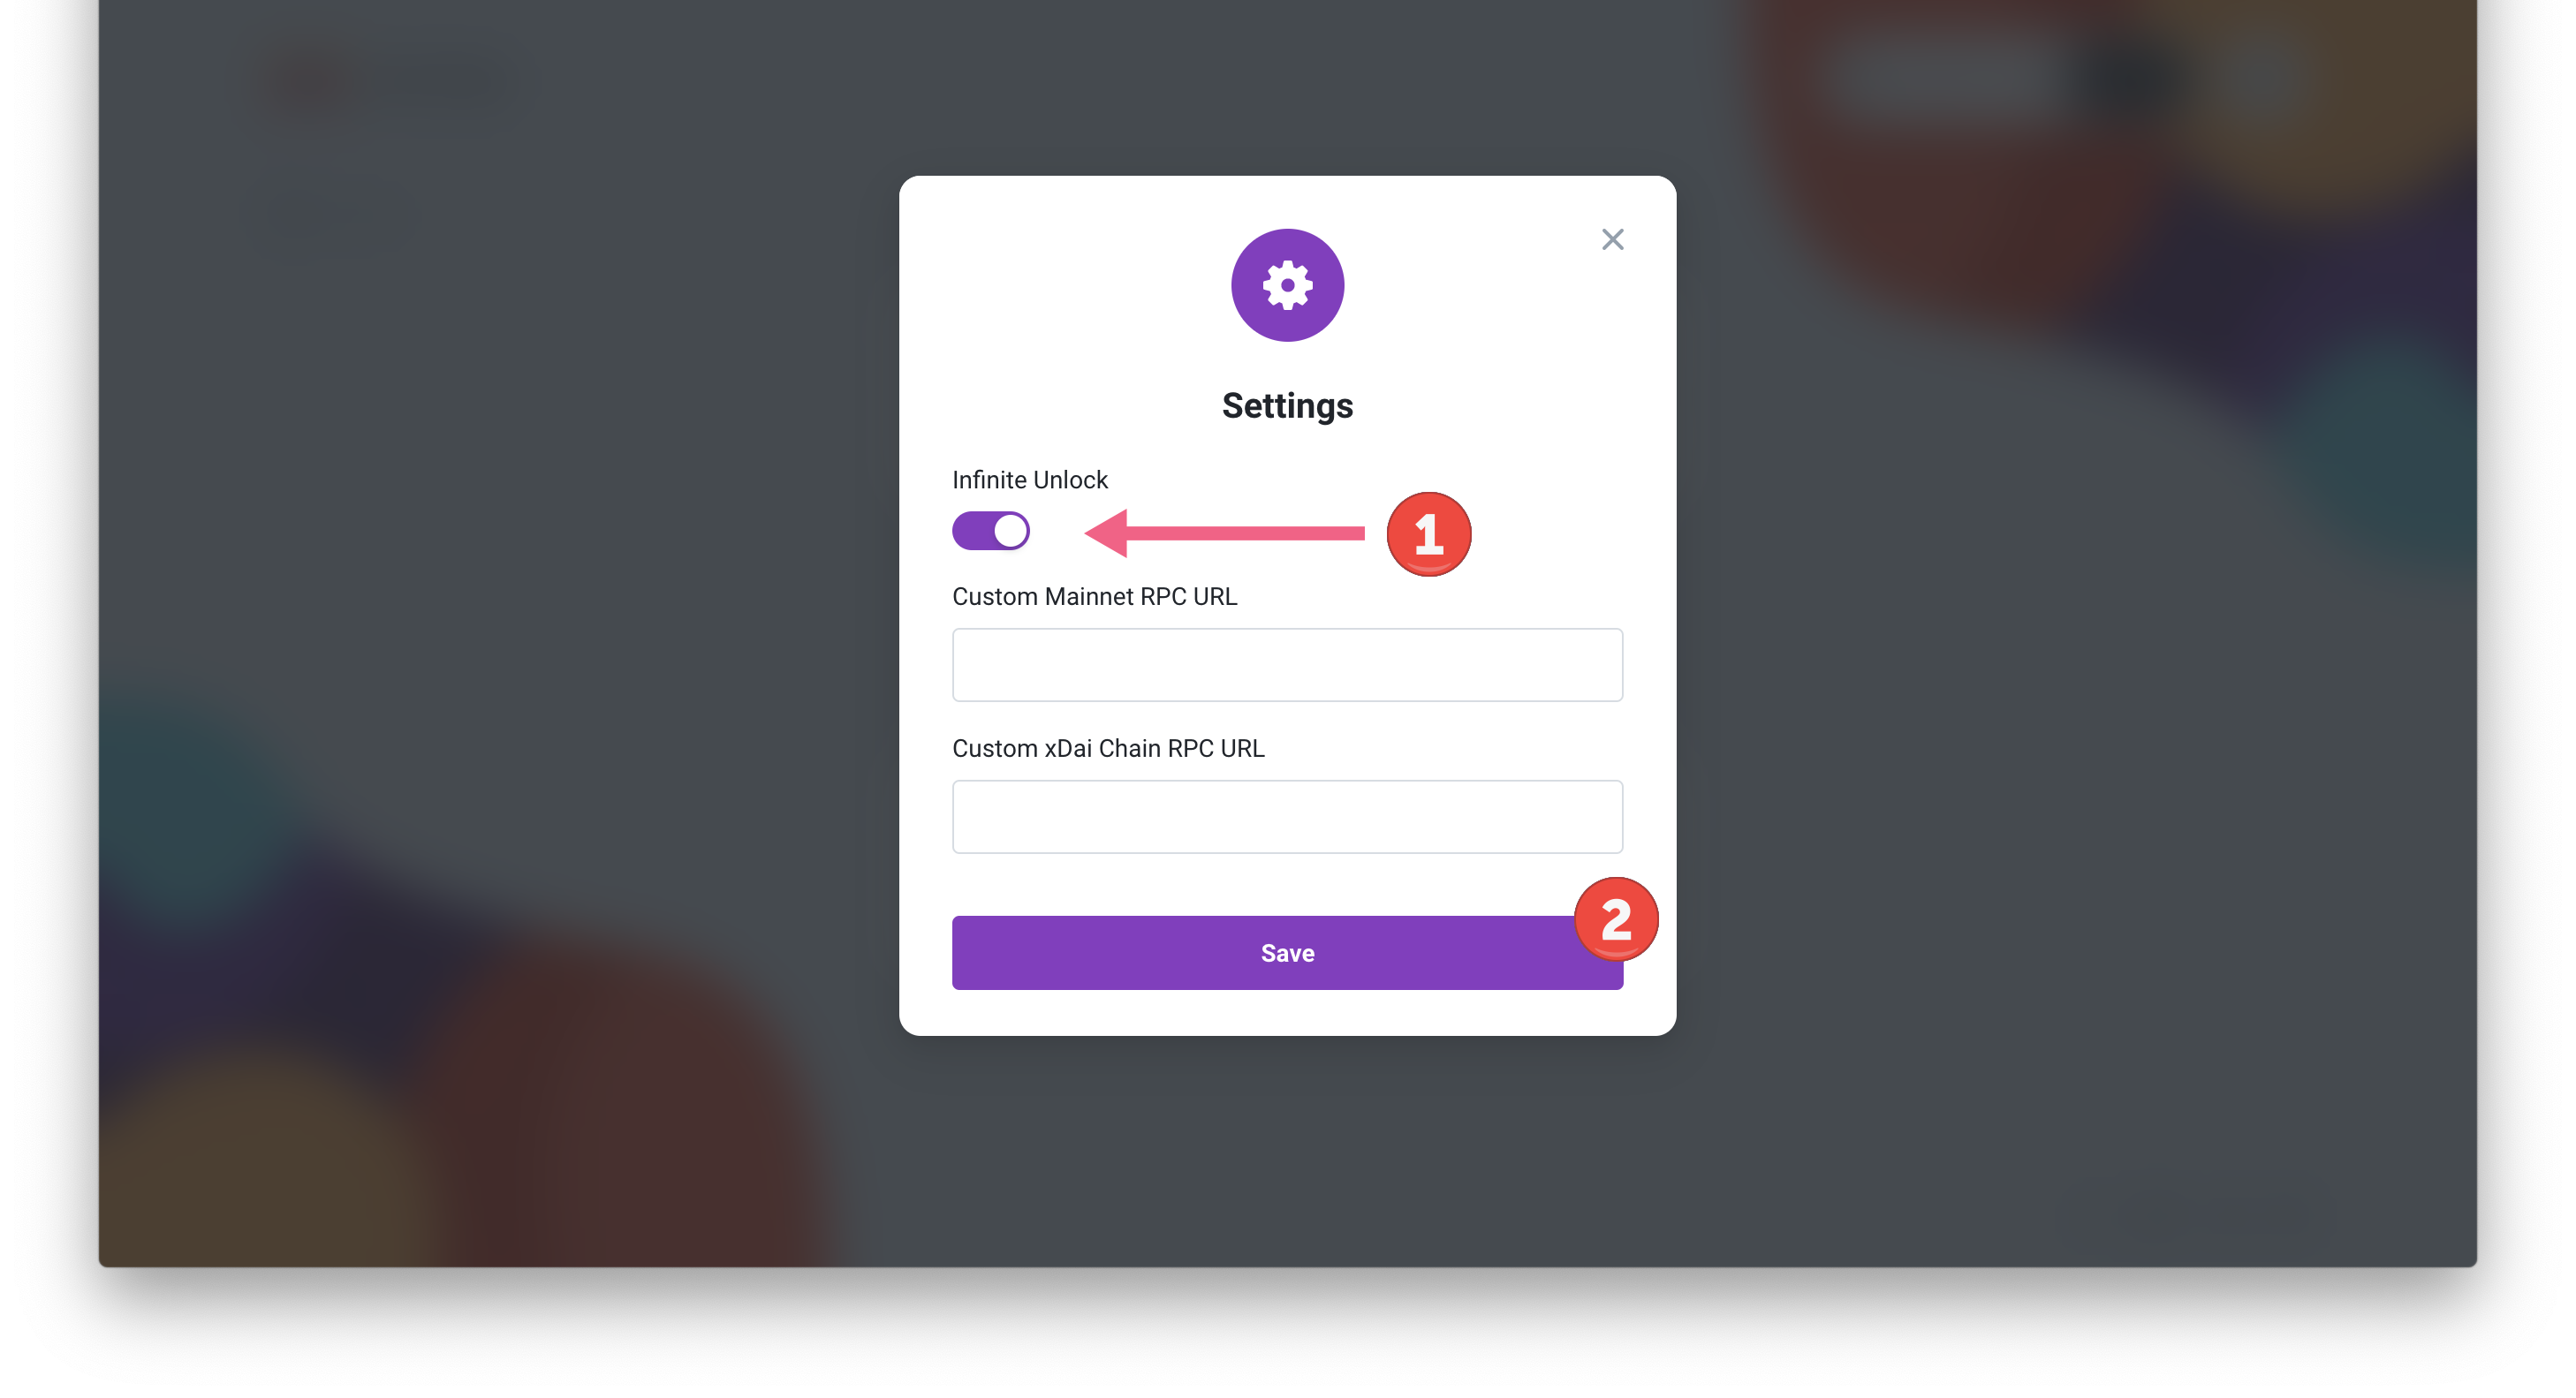
- Go to Settings

- Toggle Infinite Unlock and save. Close the modal and proceed to step 3.
-
Click on Advanced and add the Recipients Address and the amount to Dai to transfer to Gnosis. Press Unlock.
-
Confirm the Unlock transaction in MetaMask.
-
Click to Transfer and Confirm the transaction.
-
Once the initial transaction is successful, you will see consecutive Transfer Pending notifications with:
- 20 of 20 block confirmations.....
- Countdown with continue until 1 block confirmation is left.
- Waiting for execution on Gnosis side.
- Transfer Complete.
-
The transfer is complete. Check the balance of the new account by clicking on the BlockScout link or accessing the address on Gnosis Chain.
xDai to Dai
-
With xDai to Dai transfers you do not need to use the Unlock feature. Connect to Gnosis Chain in MetaMask.
- Click on Advanced.
- Enter the Address that will receive Dai.
- Enter Amount.
- Click Request.

-
Click Confirm to acknowledge you will need to perform 2 transactions.
-
Confirm the first tx in MetaMask.
-
Wait for 20 Block Confirmations on xDai.
-
Switch to Ethereum Mainnet in MetaMask. The Claim button will appear. Click Claim.
-
Confirm the second claim transaction in MetaMask. Once processed, the Dai should be available for the alternative receiver on Ethereum.
Dai to xDai (Manual, Non-UI Method)
-
Open MetaMask and choose the Ethereum Mainnet.
-
Go to the Dai Token Contract -> Write Contract functionality in Etherscan. https://etherscan.io/address/0x6b175474e89094c44da98b954eedeac495271d0f#writeContract
-
Connect to your Web3 Wallet (MetaMask).
-
Approve the bridge contract to perform operations with tokens:
usr(address)-- the address of the xDai bridge contract in the Ethereum Mainnet:0x4aa42145Aa6Ebf72e164C9bBC74fbD3788045016wad(uint256)-- the amount of tokens (in Wei) approved to send through the bridge (in this case 2 Dai):2000000000000000000- Click Write
-
Confirm the transaction in the MetaMask and wait until it is included in the chain.
-
Initialize the xDai bridge contract interface in Etherscan. Here you will write to the proxy contract. https://etherscan.io/address/0x4aa42145aa6ebf72e164c9bbc74fbd3788045016#writeProxyContract
-
You will see several
relayTokensmethods. Use Method (1) to send to an alternate address. You can also use a second method (14) if the Dai deposit is performed by another contract of behalf of the user account (like a DEX). There are also 2 otherrelayTokenmethods (4), (22) that specify a_token(address). These are not in use.
relayTokens Method (1)
_receiver (address)- address of the alternate receiver, the account that will be sent native tokens on Gnosis chain_amount (uint256)- the amount of tokens (in Wei) to transfer; must be less or equal amount of tokens approved for the bridge operations- Click Write
relayTokens Method(14)
_sender (address)- optional. Use when the Dai deposit is performed by another contract on behalf of a user account (e.g. by a DEX)_receiver (address)- address of the alternate receiver, the account that will be sent native tokens on Gnosis chain_amount (uint256)- the amount of tokens (in Wei) to transfer; must be less or equal amount of tokens approved for the bridge operations- Click Write
-
Submit the transaction in the MetaMask and wait until it is included in the chain.
-
The xDai bridge will take some time to relay the deposit request to Gnosis chain. Once complete, the balance of the
_receiveraccount will increase with the corresponding amount of xDai.
xDai to Dai (Non-UI Method)
-
Using the
relayTokensmethod under the "Write Proxy" tab, enter the receiver address in the_receiverbox, and the amount of xDai to transfer (in xDai - no need to convert to WEI). Connect your wallet and confirm the transaction. Copy the transaction hash.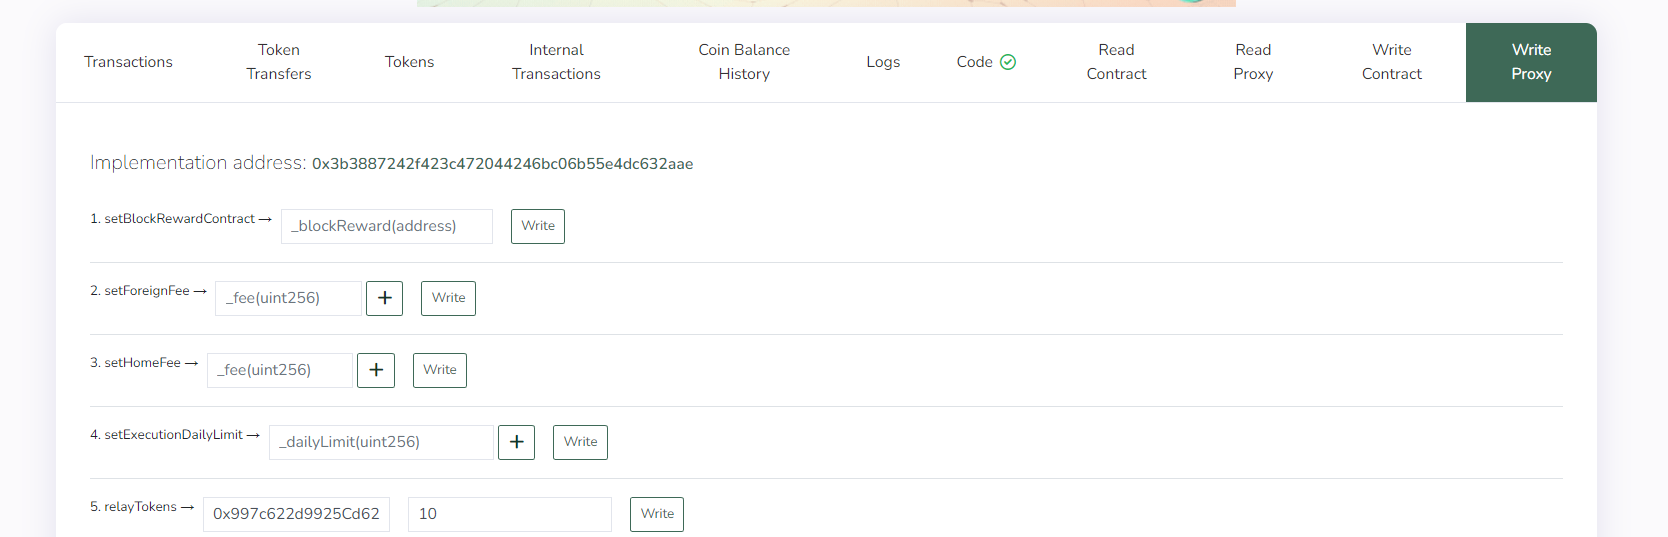
-
Go to the helper contract. In the
getMethodHash()method, enter the transaction hash from the previous step, the recipient address, and the amount being transferred. When entering the amount, you can use that little "+" icon to add the zeroes, as the amount needs to be entered in wei. Use the 10^18 option to save yourself some typing. Do not include any fees, only the amount to send. Copy the message hash after clicking query.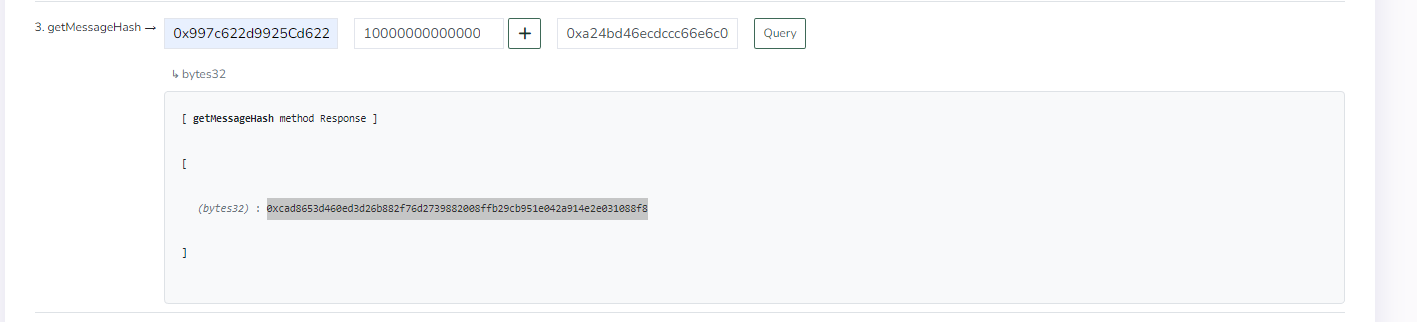
-
Paste the message hash from the previous step into the
getMessage()method. If you receive 0x0 it means either the bridge oracles did not send a confirmation for the withdrawal yet or the data entered in the step 3 is incorrect. Double check the info and if it is correct you will eventually receive the message.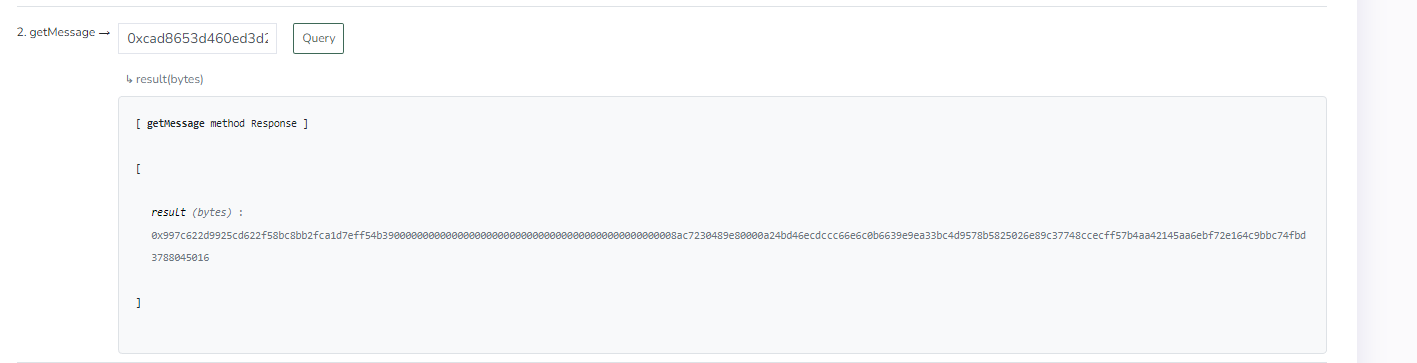
-
Once you receive the message, use the message hash from step 3 and query the
getSignatures()method with it. It should return a blob packed with the signatures provided by the validator. If enough signatures haven't been collected yet, then the query could fail. If this happens, waiting a few minutes should fix it.
-
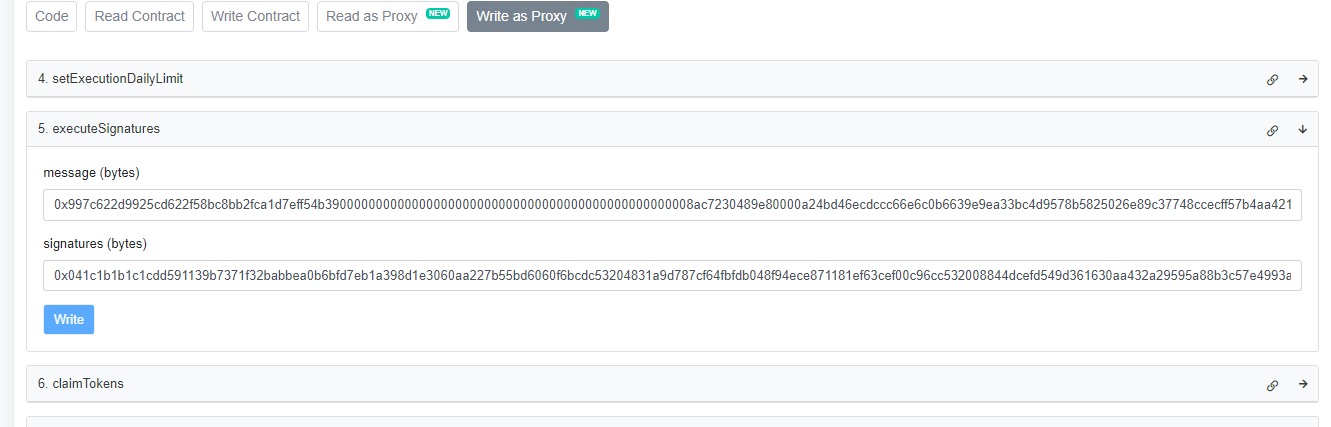
Copy and paste the signature blob and the output from step 4 into the Ethereum proxy contract's
executeSignaturesmethod (you will need some Eth for gas). Connect your wallet and click write. After the transaction processes, the funds should appear in the receiver wallet.